
The Developer’s Guide to Programmable Macropads
A programmable macropad is a compact block of dedicated keys — often paired with a rotary knob and a small display — that maps repeated actions to a single press. Instead of typing out a git command or reaching for a menu, you hit one key and the macro fires. Devices built specifically for coding workflows, such as the Codex Micro, take this further by dedicating keys to AI coding agents rather than generic app shortcuts.
This guide covers what a macropad actually is, why developers reach for one, the hardware and firmware that make it work, and how to decide between buying a ready-made unit or building your own.
What a Programmable Macropad Actually Is
A macropad is a small, standalone keyboard — usually 3 to 16 keys, sometimes with up to three rotary encoders — dedicated entirely to shortcuts and macros rather than general typing. Most store their layout in onboard memory, so they work over plain USB on Windows and macOS with no driver running in the background. The underlying switch and keycap mechanics trace back to standard keyboard technology, covered on Wikipedia’s keyboard technology overview.
Keys, knobs, and a screen
Formats range from tiny 3-key blocks for a single repetitive task to 16-key grids with two or three rotary encoders for continuous controls like volume, zoom, or scrubbing through a timeline. Keys typically sit on mechanical switches, often hot-swappable MX-style sockets so you can change the feel without soldering. A small OLED or LCD panel, when present, shows which profile or layer is active — useful when one physical key does different things depending on context.
Macros vs simple shortcuts
A shortcut is a single key combination, like Ctrl+C. A macro is a recorded sequence — several keystrokes, a delay, maybe a mouse click — fired from one press. Because the layout lives in onboard memory rather than a background app, many macropads keep working the moment you plug them into any machine, no installer required.
Why Developers Reach for One
Killing repetitive keystrokes. Git add, commit, and push; running a test suite; spinning up a Docker container; pasting a boilerplate snippet — all of these compress to one key press instead of several. NexMacro, for instance, markets itself directly at developer workflows: launching apps, running terminal commands, and opening project folders from dedicated keys.
A handful of actions show up on nearly every developer’s macropad layout:
- Git add, commit, push, and branch switching
- Running or re-running a test suite
- Starting and stopping local Docker containers
- Inserting boilerplate code snippets
- Toggling between IDE, terminal, and browser windows
Context without leaving flow. Layered profiles let one row of keys mean something different in VS Code than it does in a terminal window, and a display keeps that context visible without breaking focus. This kind of layered setup has become more relevant as coding itself changes shape — see our piece on what vibe coding actually means for how AI-assisted development is reshaping what a “shortcut” is even for. Increasingly, one of those dedicated keys just opens a browser-based assistant — a free tool like bota.chat — instead of firing a local script.
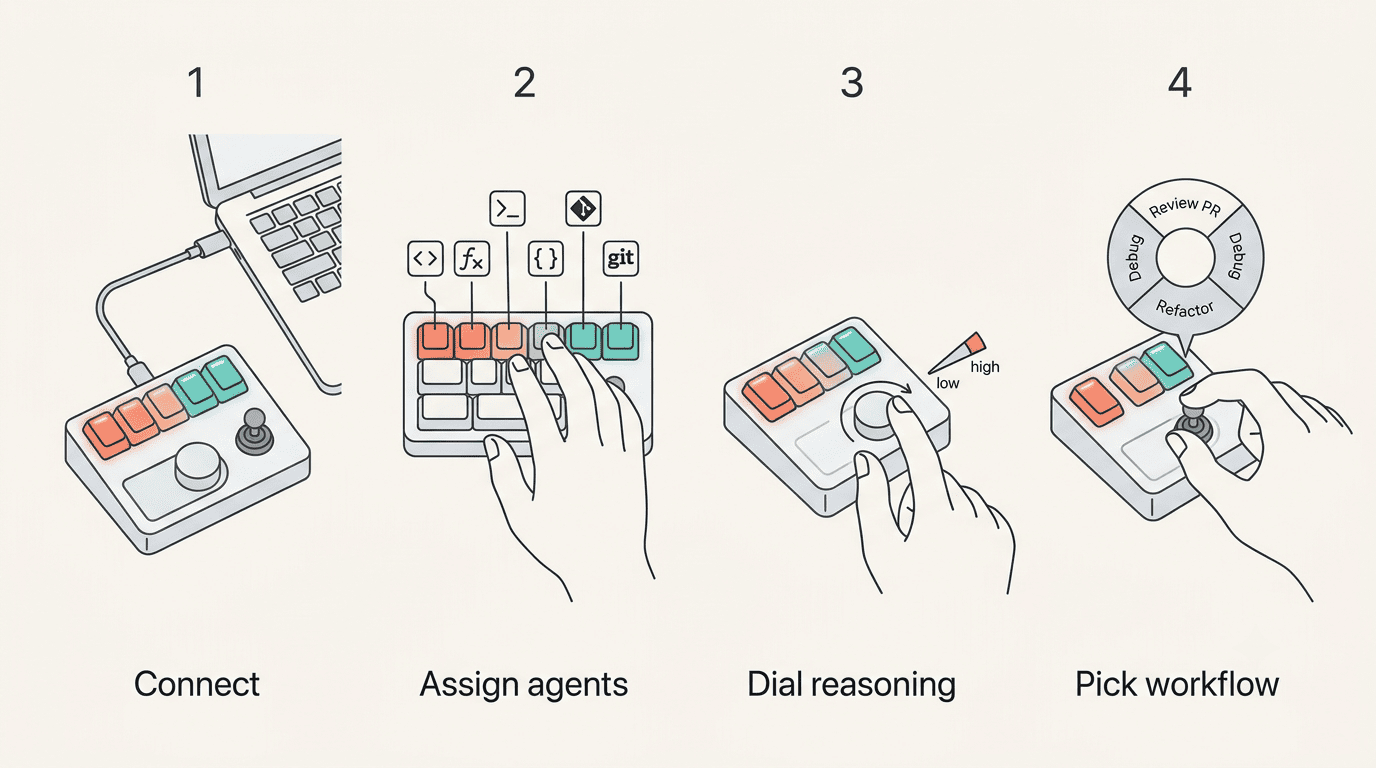
Cutting the mental overhead of menus. Every time you dig through a nested menu for a command you use daily, you lose a beat of focus. A dedicated key removes that lookup entirely — the muscle memory takes over.
The Hardware That Matters
Two devices illustrate the range well. NexMacro packs 12 keys, 2 rotary encoders, and a 3.5-inch display into a 126×105 mm hot-swap MX body with USB-C. Hapticpad is an open-source RP2040 board with a 128×64 OLED screen that can store up to 1,536 macros defined through XML files.
| Feature | NexMacro | Hapticpad |
|---|---|---|
| Keys | 12 | Varies (open design) |
| Encoders | 2 | Optional |
| Display | 3.5″ | 128×64 OLED |
| Connectivity | USB-C | USB-C |
| Macro capacity | Onboard profiles | Up to 1,536 (XML) |
| License | Closed | Open-source |
Switches, keycaps, and encoders
Hot-swap sockets let you drop in tactile, linear, or clicky switches without a soldering iron, and swap them again later. Rotary encoders handle continuous adjustments — volume, zoom, scrubbing through a diff — better than any key could, since they’re built for turning, not pressing. Work Louder is one manufacturer built around this modular idea, selling interchangeable macropad components rather than one fixed layout, per worklouder.cc.
Displays and haptics
An OLED panel that labels each key by its current function removes the guesswork of memorizing which layer is active. Hapticpad pushes this further as a fully open-source project: RP2040 microcontroller, tactile haptic feedback, and macro sets defined in plain XML rather than a proprietary configurator.
Firmware: How You Program It
QMK and open-source firmware. QMK (Quantum Mechanical Keyboard) is the most widely used open-source firmware for programmable keyboards and macropads. It handles layers, macros, custom keycodes, and RGB lighting, and it compiles down to the same RP2040 or Pro Micro-class boards that show up in most DIY builds.
VIA / VIAL for no-code remapping. VIA and its fork VIAL sit on top of QMK-compatible firmware and let you remap keys through a graphical interface, live, without recompiling anything. That matters if you want to tweak your layout weekly without touching a build toolchain.
| Approach | Setup effort | Remapping | Best for |
|---|---|---|---|
| QMK only | Requires a toolchain and recompiling | Edit code, compile, flash | Full control over macros and custom keycodes |
| VIA / VIAL | Needs QMK-compatible firmware first | Graphical, no recompiling | Frequent layout changes without a build step |
Here’s a quick sequence for getting a QMK-based macropad running from scratch:
- Confirm the board’s microcontroller (commonly RP2040) and check it against the QMK-supported keyboard list.
- Install QMK’s toolchain (qmk cli) and clone the firmware repository for your board.
- Define your keymap — assign macros, layers, and encoder behavior in the keymap file.
- Compile the firmware locally with the qmk compile command.
- Flash the compiled file to the board over USB in bootloader mode.
- If the firmware includes VIA/VIAL support, open the app and fine-tune the layout without reflashing.
- Test each key and encoder under real use before committing to a final layout.
Buy It or Build It
Ready-made units like NexMacro start around $150 and work out of the box with no firmware knowledge required. Purpose-built options aimed at AI-assisted coding, like the $230 Codex Micro — a collaboration between OpenAI and Work Louder — go further, dedicating keys to coding-agent actions rather than generic shortcuts.
Off-the-shelf options
Curated buying guides round up dozens of ready units at different price points and key counts, useful if comparing specs beats assembling something yourself. For a closer look at one agent-focused option, see our breakdown of the Work Louder Creator Micro, which shares its manufacturing lineage with the Codex Micro.
The DIY route
Building from scratch usually means an RP2040 or Pro Micro board, mechanical switches, a 3D-printed case, and QMK for firmware. One maker documented the full process — wiring, firmware, and case design — after building a macro pad from raw parts rather than a kit.
A typical DIY parts list:
- Microcontroller board (RP2040 or Pro Micro)
- Mechanical switches, hot-swap sockets optional
- Keycaps sized for the chosen switch stems
- A 3D-printed or laser-cut case
- Diodes and wiring for the key matrix
- QMK (and optionally VIA/VIAL) firmware
How to Choose the Right One
Most developers land somewhere between 6 and 12 keys before the extras go unused, so start there rather than maxing out the grid. Run through this checklist before buying:
- Count how many distinct actions you’d actually bind — don’t overbuy keys you won’t use
- Decide if a rotary knob or display justifies its added cost
- Check whether the firmware is QMK/VIA-compatible or a closed vendor app
- Confirm it connects over standard USB for both Windows and macOS
- Check hot-swap support if you expect to experiment with switch feel
The QMK project itself describes its scope plainly in its own documentation:
This is a keyboard firmware based on the tmk_keyboard firmware with some useful features for Atmel AVR and ARM controllers, and more specifically, the OLKB product line, the ErgoDox EZ keyboard, and the Clueboard product line.
QMK Firmware README
That scope is exactly why it dominates both DIY macropads and many commercial ones — the same firmware base scales from a 3-key hobby board to a full ergonomic keyboard.